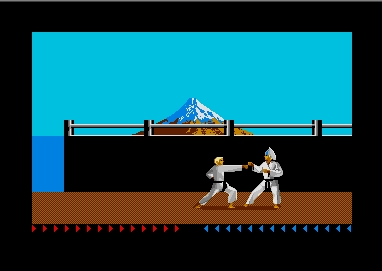
An overscan screen is not a demo effect but a technique or better said a « trick » developed and used by coders to display things beyond the theoretically limited window size of the Atari ST. To all of you, especially the young ones, it may sound strange but yes, computers from the 80s could not display pictures on the full monitor screen!
The Atari ST for instance could display pictures into a 320 pixel wide and 200 pixel high window. Beyond these limits the screen was nothing but… black. That is the reason why, in my humble opinion, these limits were called « borders » as if they were some sort of « unbreakable » boundaries.

Consider the picture above as a reference and understand that sometimes our window seemed a bit small. So we thought until the overscan suddenly widened our viewpoint! Each coder secretly kept his tricks to achieve such « magic » and display images in the lower border (first attempt in 1987) already but soon coders also managed to display images in the upper border… Last but not least the final frontiers were broken with the right and left borders as well but let’s first have a look at an expanded screen.

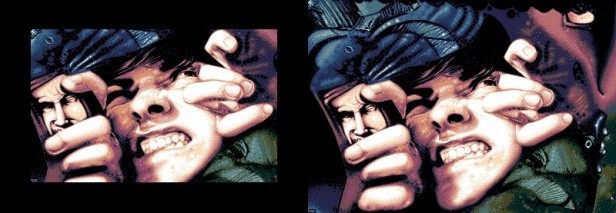
What we call overscan is the extended window whether there is one border opened, or two or three. This overscan technique can be used with « moving » screens as above but also to display pictures (still screens) such as below :

This example shows how much space is added, impressive isn’t it ? By the way I need to apologize : first because some screenshots on my blog are crippled so that you won’t always see the borders and secondly because I cannot give you technical explanations about overscan. Luckily enough wizcoder Evil of Dead Hackers Society wrote technical details so go ahead and read them for more info…
Anyway in this picture you can notice that not only the left and right borders are removed but also the upper and lower ones. This is then called a fullscreen as the whole space available on screen is used.
To make things clear, an overscan is a screen with at least 2 borders removed be it horizontal or vertical ones. When all borders are removed we call it a fullscreen and as you can guess it is harder to remove all of them. 🙂


Since I am not familiar with the early Atari ST demos from the 80s when the first attempts at breaking the borders were to be seen, I can only recommend you pay a visit to this cool website to know more about the history of overscan demos.
Like I said earlier screenshots are not always suitable that is why I invite you to watch some videos like this one taken from 2009 Suretrip II demo by Checkpoint. Here you cannot miss the moment when the screen goes bigger and wider :
What about 2003 Posh demo also by Checkpoint? Words are useless here…
In the « old » days, understand the late 80s and the 90s, there were not so many overscan screens and even fewer fullscreens that were actually seen as technical treats. However today’s demos have brought us so many progresses that expanded screens are almost « everyday’s bread » (not meaning in any way that anyone can do it though). The following demo is a stunning example of a full show in fullscreen. Please take a seat, relax and enjoy the show we are given by Dead Hackers Society with this 2014 SNDH 4.4 Update.

Ton évocation de la maîtrise progressive de la technique de l’overscan par les coders ST m’a rappelé cet article assez fabuleux de Zappy :
http://www.codercorner.com/DemosEtMerveilles.htm
J’aimeJ’aime
J’ai essayé de faire simple en me disant que la plupart des lecteurs (futurs lecteurs je veux dire) n’ont pas forcément conscience de tout ça, mais perso je suis encore et toujours bluffé par les overscan ou les fullscreen. Les dernières démos de DHS semblent être capables de TOUT faire en fullscreen et franchement je suis content d’en être encore émerveillé ! L’article de Zappy (que j’ai du lire, vu sa provenance) est très enrichissant et passionnant !
J’aimeJ’aime